K8s primer - Part II
This primer is targeted at developers who mainly work on product features but may also need to understand the basics of Kubernetes at a practical level, so they know how their applications are deployed and managed.
Requirements: Docker and minikube.
First part in K8s Primer - Part I
If you’re coming from Part I, resume your local K8s cluster with the folling command:
$ minikube start --nodes 3 -p minikube-lab
Why aren’t Pods and Deployments enough?
K8s Deployments represent a set of multiple, identical Pods. They allow us to run multiple replicas of our application and automatically replace any instance that fails or becomes unresponsive. That’s nice and all, but we still face some inconveniences:
- We communicate directly with individual Pods via IP addresses
- We cannot reach our application from outside the K8s cluster
It’s a bad idea to reach individual Pods by their IP addresses because Pods are ephemeral (e.g., during a rolling upgrade, old Pods are removed and new ones created). Also, if we cannot reach our Pods from outside the K8s cluster, that limits what we can do. It would be great if we could reach our application (our Pods) by name from outside the K8s cluster. As you can imagine, we need a few more K8s objects to accomplish this.
K8s Services
You can think of a K8s Service as a stable layer that sits between the clients of your application and the set of Pods (managed by a Deployment) that compose your application. It’s a stable layer because it provides a static IP address and DNS name that don’t change regardless of what happens to your Pods and Deployments. With a K8s Service we provide stable networking: a client sends requests to the Service, and the Service forwards them to the Pods. The Service is stable, but the Pods are changing all the time.
File ./k8s/service.yaml
apiVersion: v1
kind: Service
metadata:
  name: helloworld-service
spec:
  selector:
    app: helloworld-backend
  ports:
    - port: 7070
With this manifest file we are telling K8s:
Hey K8s, create a Service called
helloworld-servicethat provides stable networking (a static IP address and port) to all the Pods that have the labelapp=helloworld-backend
Let’s submit the manifest:
$ k apply -f k8s/service.yaml
service/helloworld-service created
And let’s see what we got:
$ k get service -o wide
NAME                 TYPE        CLUSTER-IP      EXTERNAL-IP   PORT(S)    AGE   SELECTOR
helloworld-service   ClusterIP   10.100.210.87   <none>        7070/TCP   28s   app=helloworld-backend
kubernetes           ClusterIP   10.96.0.1       <none>        443/TCP    2d   <none>
We got a K8s service called helloworld-service with the static IP address
10.100.210.87, and port 7070, which forwards requests to all the Pods
that have the label app=helloworld-backend. Let’s get more details:
$ k describe service helloworld-service
Name:              helloworld-service
Namespace:         default
Labels:            <none>
Annotations:       <none>
Selector:          app=helloworld-backend
Type:              ClusterIP
IP Family Policy:  SingleStack
IP Families:       IPv4
IP:                10.100.210.87
IPs:               10.100.210.87
Port:              <unset>  7070/TCP
TargetPort:        7070/TCP
Endpoints:         10.244.0.7:7070,10.244.0.8:7070,10.244.0.9:7070
Session Affinity:  None
Events:            <none>
Behind the scenes, K8s ensures that our Service always maintains an
up-to-date list of healthy Pods matching the required label. This list of
matching Pods is stored in the Endpoints object. We can also see that
the Type of our Service is ClusterIP, which means our Service is only
reachable from within our local K8s cluster.
Reaching our Go application by name
At this point, our Go application is reachable by name from within our
local K8s cluster. The short name of our Service is helloworld-service, while
the full name is helloworld-service.default.svc.cluster.local. Since we didn’t
specify a namespace for our Service in the manifest file, it was assigned the default
namespace (default). The rest, .svc.cluster.local, is automatically appended by K8s.
We should be able to run curl helloworld-service:7070 and get a response, but
unlike previous steps where we could run commands on any K8s node, name
resolution (i.e., from helloworld-service to an IP address) can only be done within
Pods (containers), therefore we need to execute the curl command inside a Pod.
Our Pods (containers) do not have curl installed, nor can we install it; we lack
the necessary tooling (e.g., apk, apt) inside our containers since they are
production-like, and omit many utilities. This is not a big deal, though; we can create
a “debugging” Pod and run it in our K8s cluster to run arbitrary commands:
$ kubectl run -it --rm --image=curlimages/curl curly -- sh
Here we start a Pod (with one container based on the official Docker
image for curl curlimages/curl) in interactive mode and then open a shell inside
that container. Once inside, we can try to reach our application:
/ $ curl helloworld-service:7070
Hello world (ID: 3800977759062674150)

/ $ curl helloworld-service:7070
Hello world (ID: 7899672086525838020)
Finally, our application is reachable by name. When we reach our application by name, we don’t know which Pod (instance) we are actually calling. Our K8s Service is on charge of balancing the load to the appropriate Pod when handling incoming requests. That’s why we see different IDs in the response when calling our application.
Accessing our Go application from outside the cluster
So far we are able to:
- Deploy our Go application (one or multiple instances)
- Reach our Go application by name and port
We have a few alternatives for getting external traffic into our cluster.
NodePort
File ./k8s/nodeport.yaml
apiVersion: v1
kind: Service
metadata:
  name: helloworld-service2
spec:
  type: NodePort
  selector:
    app: helloworld-backend
  ports:
    - port: 7070
      nodePort: 30100
      targetPort: 7070
      protocol: TCP
A K8s NodePort is just another type of K8s Service. The first Service we
defined previously (./k8s/service.yaml) had the default type ClusterIP.
The difference between NodePort and ClusterIP is that with NodePort K8s
opens a port on every node in the cluster and forwards any traffic sent to that port
to our service. The biggest downside of this approach is that if your Node’s
IP address changes, then you’ll need to deal with that. Let’s submit
the NodePort Service:
$ k apply -f k8s/nodeport.yaml
service/helloworld-service2 created
$ k get service                                                                                                                                                         20:22:45
NAME                  TYPE        CLUSTER-IP      EXTERNAL-IP   PORT(S)          AGE
helloworld-service    ClusterIP   10.100.210.87   <none>        7070/TCP         61m
helloworld-service2   NodePort    10.96.45.99     <none>        7070:30100/TCP   94s
kubernetes            ClusterIP   10.96.0.1       <none>        443/TCP          4d
We got a new service (helloworld-service2), and we can reach it via any
node in our K8s cluster. Since we are using minikube, to reach any
node of the cluster from our personal machine, we need make the cluster’s
nodes reachable by opening a tunnel using port forwarding.
Run the following command in a separate terminal:
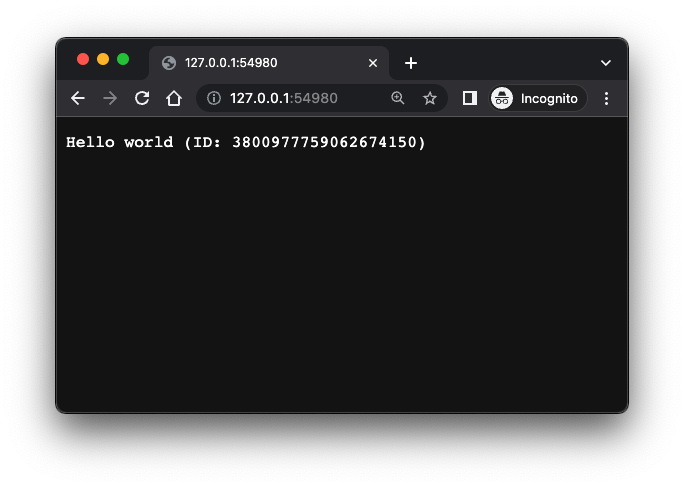
$ minikube -p minikube-lab service helloworld-service2 --url
http://127.0.0.1:54980
❗  Because you are using a Docker driver on darwin, the terminal needs to be open to run it.
Now, from our personal machine, we can either run curl http://127.0.0.1:54980
in a new terminal or open that address in a browser:
LoadBalancer
A K8s LoadBalancer is the standard way to expose a service to external traffic. You can use LoadBalancer if your (cloud) provider supports it:
File ./k8s/loadbalancer.yaml
apiVersion: v1
kind: Service
metadata:
  name: helloworld-service3
spec:
  type: LoadBalancer
  selector:
    app: helloworld-backend
  ports:
    - port: 9000
      targetPort: 7070
$ k apply -f k8s/loadbalancer.yaml
service/helloworld-service3 created
$ k get service
NAME                  TYPE           CLUSTER-IP      EXTERNAL-IP   PORT(S)          AGE
helloworld-service    ClusterIP      10.100.210.87   <none>        7070/TCP         106m
helloworld-service2   NodePort       10.96.45.99     <none>        7070:30100/TCP   46m
helloworld-service3   LoadBalancer   10.108.116.80   <pending>     9000:30025/TCP   20s
Our Service helloworld-service3 provisions a load balancer listening on
port 9000, which forwards all traffic to our internal Pods on port 7070. Notice
that the EXTERNAL-IP column should display the external IP assigned to
our Service by our cloud provider. In our case, minikube hasn’t assigned any
IP yet, hence the pending state. Let’s fix this. On a separate terminal run:
$ minikube -p minikube-lab tunnel
✅  Tunnel successfully started

📌  NOTE: Please do not close this terminal as this process must stay alive for the tunnel to be accessible ...

🏃  Starting tunnel for service helloworld-service3.
Then check the status of our helloworld-service3 service again:
$ k get service helloworld-service3
NAME                  TYPE           CLUSTER-IP      EXTERNAL-IP   PORT(S)          AGE
helloworld-service3   LoadBalancer   10.108.116.80   127.0.0.1     9000:30025/TCP   4m11s
Now it has an external IP. It’s the localhost IP, let’s try reaching our service from our personal machine:
$ curl localhost:9000
Hello world (ID: 7899672086525838020)
It works!
Recap
So far, we have quite a few things running in our local K8s cluster:
- A Go application
- A Docker container running the Go application
- One or more K8s Pods running our application container
- A K8s Deployment grouping a set of replicated Pods
- A K8s Service that allows us to reach our app by name from within the cluster
- Two additional K8s Services that let us reach our app by name from within the cluster and handle external traffic by load-balancing across our dynamic set of Pods
K8s Ingress
K8s NodePort and K8s LoadBalancer are nice but have limitations. NodePorts require you to manage how to address nodes by IP (or name). LoadBalancer fixes this, but you need one LoadBalancer per Service. This wasn’t an issue in our toy example because we only had one Service, but in real-world applications, you may not want to deploy one LoadBalancer per internal Service. Another limitation of LoadBalancers is that they operate at the network level, meaning you cannot use them to balance load based on HTTP headers, path names, or similar criteria.
A K8s Ingress is an object that manages external access to our services in the cluster, providing, among other things, HTTP-based routing.

Unlike other K8s objects we have talked before, when we talk about K8s Ingress, we refer to two things:
- The Ingress object
- The Ingress controller
The Ingress object defines the rules that allow external access to our cluster. An Ingress controller implements the rules defined in the Ingress object. Usually, a K8s cluster doesn’t come with a predefined Ingress Controller (although hosted K8s clusters like EKS and GKE come with pre-installed ones). Minikube comes with an NGINX Ingress Controller, but you have to enable it:
$ minikube -p minikube-lab addons enable ingress
💡  ingress is an addon maintained by Kubernetes. For any concerns contact minikube on GitHub.
You can view the list of minikube maintainers at: https://github.com/kubernetes/minikube/blob/master/OWNERS
💡  After the addon is enabled, please run "minikube tunnel" and your ingress resources would be available at "127.0.0.1"
    ▪ Using image k8s.gcr.io/ingress-nginx/controller:v1.2.1
    ▪ Using image k8s.gcr.io/ingress-nginx/kube-webhook-certgen:v1.1.1
    ▪ Using image k8s.gcr.io/ingress-nginx/kube-webhook-certgen:v1.1.1
🔎  Verifying ingress addon...
🌟  The 'ingress' addon is enabled
Minikube is telling us that in order for our ingress resources to be
available via 127.0.0.1, we need to open a tunnel (this requires root
password since it opens privileged ports):
$ minikube -p minikube-lab tunnel
✅  Tunnel successfully started

📌  NOTE: Please do not close this terminal as this process must stay alive for the tunnel to be accessible ...

❗  The service/ingress helloworld-ingress requires privileged ports to be exposed: [80 443]
🔑  sudo permission will be asked for it.
🏃  Starting tunnel for service helloworld-ingress.
Password:
In another terminal, let’s verify that our Ingress Controller is up and running:
$ k get pods -n ingress-nginx
NAME                                        READY   STATUS      RESTARTS   AGE
ingress-nginx-admission-create-hcr6h        0/1     Completed   0          2m
ingress-nginx-admission-patch-cpnkk         0/1     Completed   1          2m
ingress-nginx-controller-5959f988fd-l8mk9   1/1     Running     0          2m
The NGINX Controller Pod should be running under the ingress-nginx
namespace and with the status Running. The two Pods in the Completed state
were short-lived ones that helped initialize the main one.
Now we have one NGINX Controller in your cluster. Let’s deploy an Ingress object to route all the traffic to our internal application service.
File: ./k8s/ingress.yaml
apiVersion: networking.k8s.io/v1
kind: Ingress
metadata:
  name: helloworld-ingress
spec:
  ingressClassName: nginx
  rules:
    - host: helloworld.test
      http:
        paths:
          - path: /crash
            pathType: Prefix
            backend:
              service:
                name: helloworld-service
                port:
                  number: 6060
          - path: /
            pathType: Prefix
            backend:
              service:
                name: helloworld-service
                port:
                  number: 7070
The Ingress manifest looks like this:
spec.ingressClassName: nginx: we are telling K8s to use the NGINX Ingress Controller we enabled earlier.spec.rules: we have one rule that routes any traffic arriving at the hostname helloworld.test to our helloworld-service service, with the detail that any request arriving at the path/crashwill hit port 6060 of our service (which our service is not listening on), and any other request to any path starting with/will hit our service on port 7070.
Let’s submit our Ingress:
$ k apply -f src/k8s/ingress.yaml
ingress.networking.k8s.io/helloworld-ingress created
$ k get ingress
NAME                 CLASS   HOSTS             ADDRESS        PORTS   AGE
helloworld-ingress   nginx   helloworld.test   192.168.49.2   80      3m
The ADDRESS column shows the public endpoint of our Ingress. Since we have
opened the Minikube tunnel, the public endpoint will be available via
our localhost address 127.0.0.1. To reach our application by its name (helloworld.test),
we need to update the /etc/hosts file on our local machine:
File /etc/hosts
...
127.0.0.1 kubernetes.docker.internal helloworld.test
...
On macOS, we need to add our service hostname helloworld.test next to
any existing entry that already maps a hostname to 127.0.0.1. In our
case, Minikube automatically adds the entry 127.0.0.1 kubernetes.docker.internal
when running, so we just added helloworld.test next to it.
We can finally reach our service by name and from outside the local cluster:
$ curl helloworld.test
Hello world (ID: 994753618341664209)

$ curl helloworld.test/crash
<html>
<head><title>503 Service Temporarily Unavailable</title></head>
<body>
<center><h1>503 Service Temporarily Unavailable</h1></center>
<hr><center>nginx</center>
</body>
</html>
The rules defined in our Ingress object are handling correctly
requests arriving at /crash and /.
What else?
We’ve covered some of the basic concepts in the K8s world:
- Cluster
- Node
- Pod
- Deployment
- Service (ClusterIP, NodePort, LoadBalancer)
- Ingress
We’re now able to deploy an application and make it accessible to the outside world (using minikube, though). But there are many other topics we haven’t covered yet, such as:
Hopefully, with the fundamentals covered in this primer, you now have a mental model of where the remaining pieces of the K8s puzzle fit.
References
The official K8s documentation is good, but it’s extensive and dense. It contains a lot of information you may not need right away, and while the sections are linked together, they do not tell a unified story to follow. Here are two books I recommend if you want a solid overview of Kubernetes, covering both the theory and practical aspects:
Kubernetes: Up and Running, 2nd Edition. By Brendan Burns, Joe Beda, Kelsey Hightower
The Kubernetes Book, 2021 Edition. By Nigel Poulton and Pushkar Joglekar